There’s no way around it: your product images matter.
As we saw in our Chapter 2 discussion of product descriptions, product images and descriptions are neck-and-neck for the two most important elements of your product showcase.
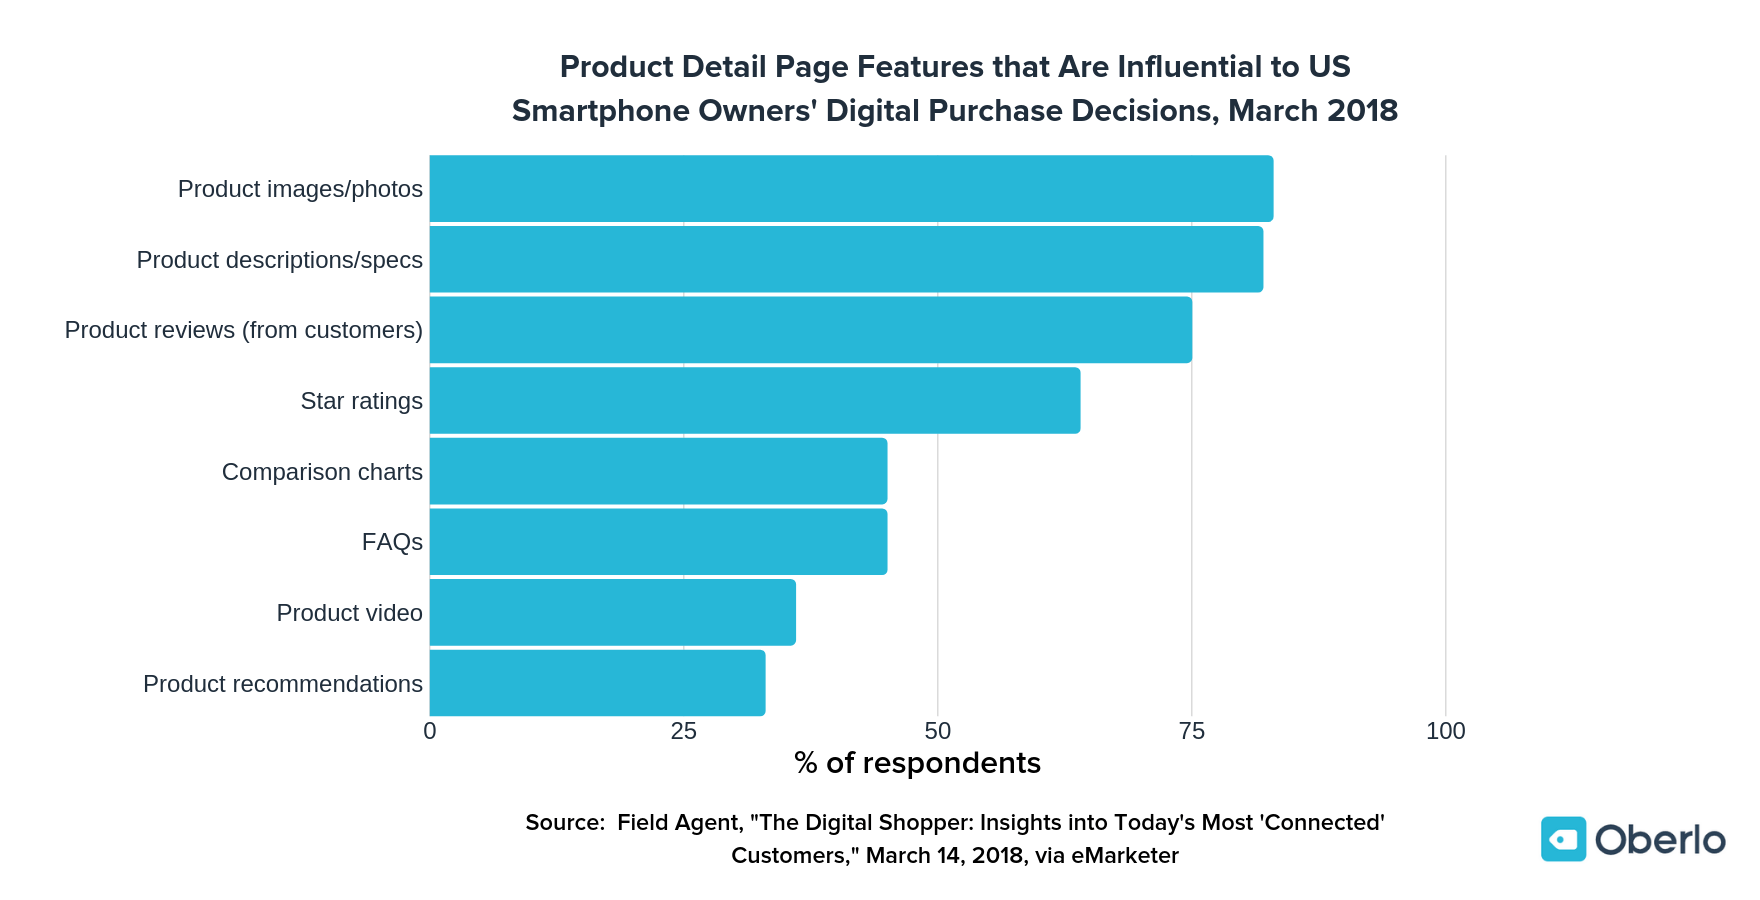
And another survey found that 60% of online shoppers in the U.S. said they need three to four photos on average before they buy a product.
This need for strong product images makes sense – it’s all they have to make the leap of faith that your product is as good as you say it is.
In this chapter, we’ll cover:
- How to find good photos online if you’re dropshipping
- How to take product photos at home if you have the resources
- Some product photo editing tips to perfect your masterpieces
- Additional tips, like photo sizing and alt tags
Here we go.

Don’t wait for someone else to do it. Hire yourself and start calling the shots.
Get Started FreeBe selective when choosing existing images
While we strongly recommend that taking product photos of your own, it’s not 100% necessary if you’re dropshipping. That’s because dropshipping suppliers often include decent product photos in their listings.
As we noted in Chapter 2’s discussion of product descriptions, both the Oberlo app and the AliExpress Product Importer Chrome extension will import key product info directly into your Import List.
Going back to our “I Love You” projection necklace example from Chapter 2, here are the photos that Oberlo automatically imported:
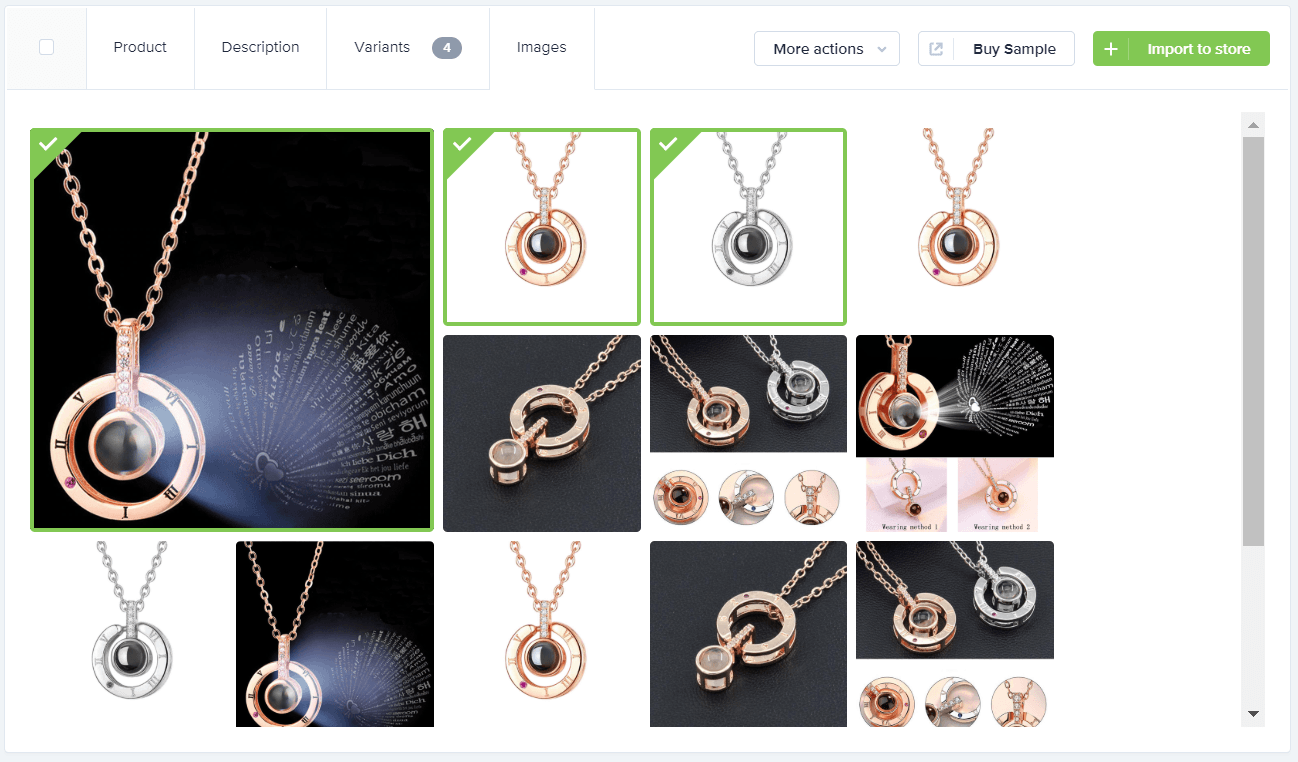
There are some duplicates, and a few that we just don’t like. No sweat, as you can just choose what you want and you’re ready for the next step.
You might also find a few that have logos or unnecessary text, which are usually easy to remove using a photo editing app, which we’ll discuss soon.
Pro tip: Before you choose a supplier, we recommend asking permission to use their product photos on your store. This can help avoid issues or complications down the road.
Finding stock photos
If you’re selling a common product, you may be able to find suitable product images on stock photography websites.
Warning: You must be certain that the image you’re using is an accurate depiction of your product. Otherwise, you’re committing false advertising, which can land you some serious penalties (not to mention it’s plain wrong). The slogan here is anti-Nike: Just don’t do it.
You can check out free stock photography sites like:
If you have some extra space in your budget, check out paid sites like iStock, Shutterstock, and Dreamstime.
For example, if you’re selling yoga mats, you can find some beautiful supporting photos that don’t necessarily feature your product, but can help create the tone and mood you want your brand to convey.
Like this one, which would be great for a yoga website geared toward adventurers and nature lovers:

But using other people’s photos can only get you so far. If you want true control over your brand, learning how to take product photos is the way to go.
Types of product images
Before you start shooting, you’ll need to figure out the type of product image that best showcases your store and its products. Here are some of the most popular.
Lifestyle
The lifestyle image helps people envision themselves using your product. Typically, these photos show people using the product in a natural way. For example, you can create lifestyle photos of people eating dinner on your tableware, or out and about while wearing your jewelry.
Example: Smartphone bike mount brand Quad Lock uses lifestyle imagery of their gear in use. In this photo of their smartphone bike mount kit, you can see raindrops on the phone case and trees in the background.
These seemingly small details play a big role in illustrating that the kit can withstand rugged and adventurous outdoor use.

Plain background
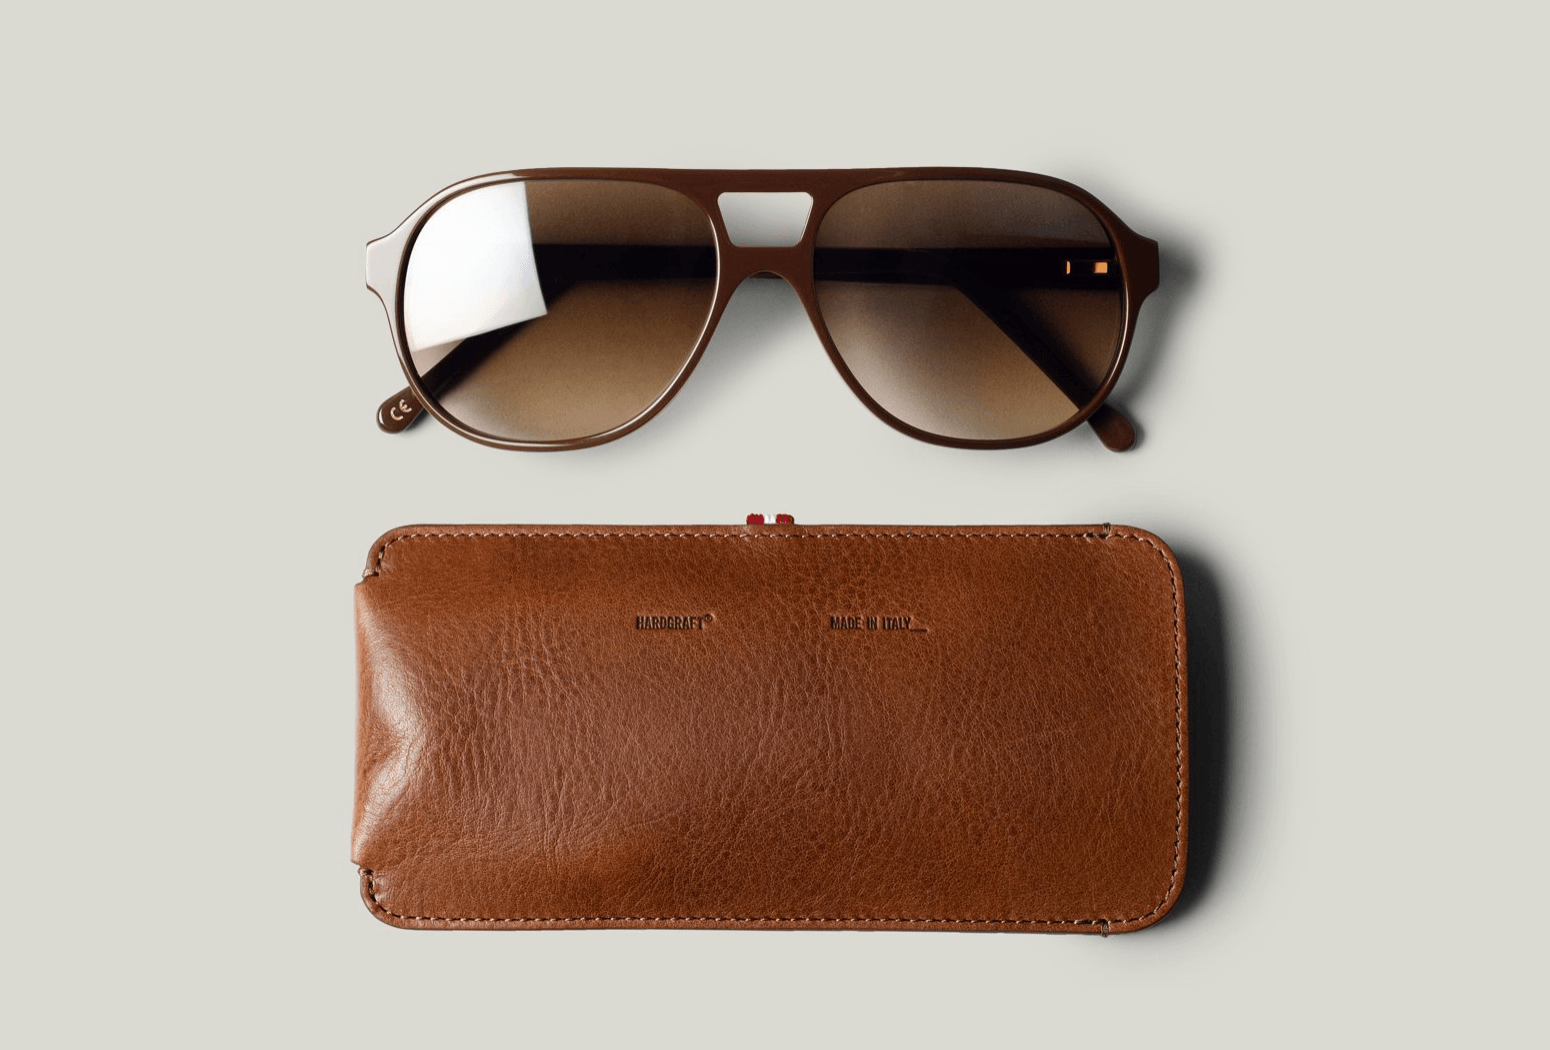
This type of product image is pure, simple, and very common: the realistic product shot on a white or plain colored background. Though not as evocative as the lifestyle image, it helps ensure visitors can see all the details, including the natural color of your product.
Plus, this minimalist approach can add a clean and sophisticated tone to your photos and overall brand.
Example: Luxury leather goods store Hard Graft uses plain background images to ensure potential customers can get a clear picture of its products.
Group
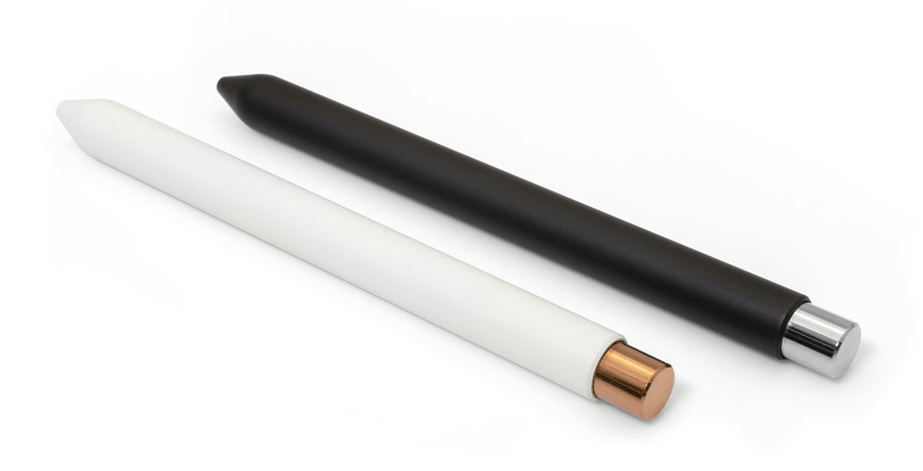
Group images are a great way to demonstrate options to the customer. These can be different variations of the same product, like multiple colors of a shoe. Or, they can be other types of items that complement the original one, like a case and screen protector for a smartphone.
Example: Minimalist product creator Studio Neat uses a group image on some of its product pages to showcase product variations to its visitors. Here’s an example of their Mark One retractable pen.
Pro tip: Photograph your products from all sides and angles to show a 360-degree view of your product. Experiment with different types of product images to see what works best for your store.
Now that you know the most common approaches, let’s look at the next step in the process: taking product images.
How to take product photos
If you’re on a budget or you want to learn how to take product photos at home, you can still get impressive results without spending thousands of dollars on special equipment.
Here are some helpful tips.
Get a decent camera
When it comes to buying a camera for product photography, a lot of less-expensive models can get you the quality of photo that you need without the high price. The Canon PowerShot SX530 HS and Nikon COOLPIX B500 are good options.
All you really need a camera that’s capable of taking high-resolution images that don’t look blurry on a digital screen.
Newer smartphones like the iPhone X are also a great option. If you’re one of the many people who have purchased one, you already have a high-quality camera for product photography, right in your pocket.
To learn how to take product photos with iPhone models, check out this tutorial.

Invest in a tripod
For most people, getting clear shots means buying a small tripod. For smartphones and DSLRs, you’ll find a number of models in the $10-$50 range.
If you don’t have the budget for this purchase, try stabilizing your camera on a shelf or other sturdy base.
Create a simple lighting setup
The best lighting setup is one with lots of natural light. For the best results, plan to do your shoot in the golden hour (the time after sunrise or before sunset) to get clean, soft lighting.
The other option is to get a light box. These work well for shooting items like toys and jewelry pieces. You can even make your own DIY light box for less than $10.
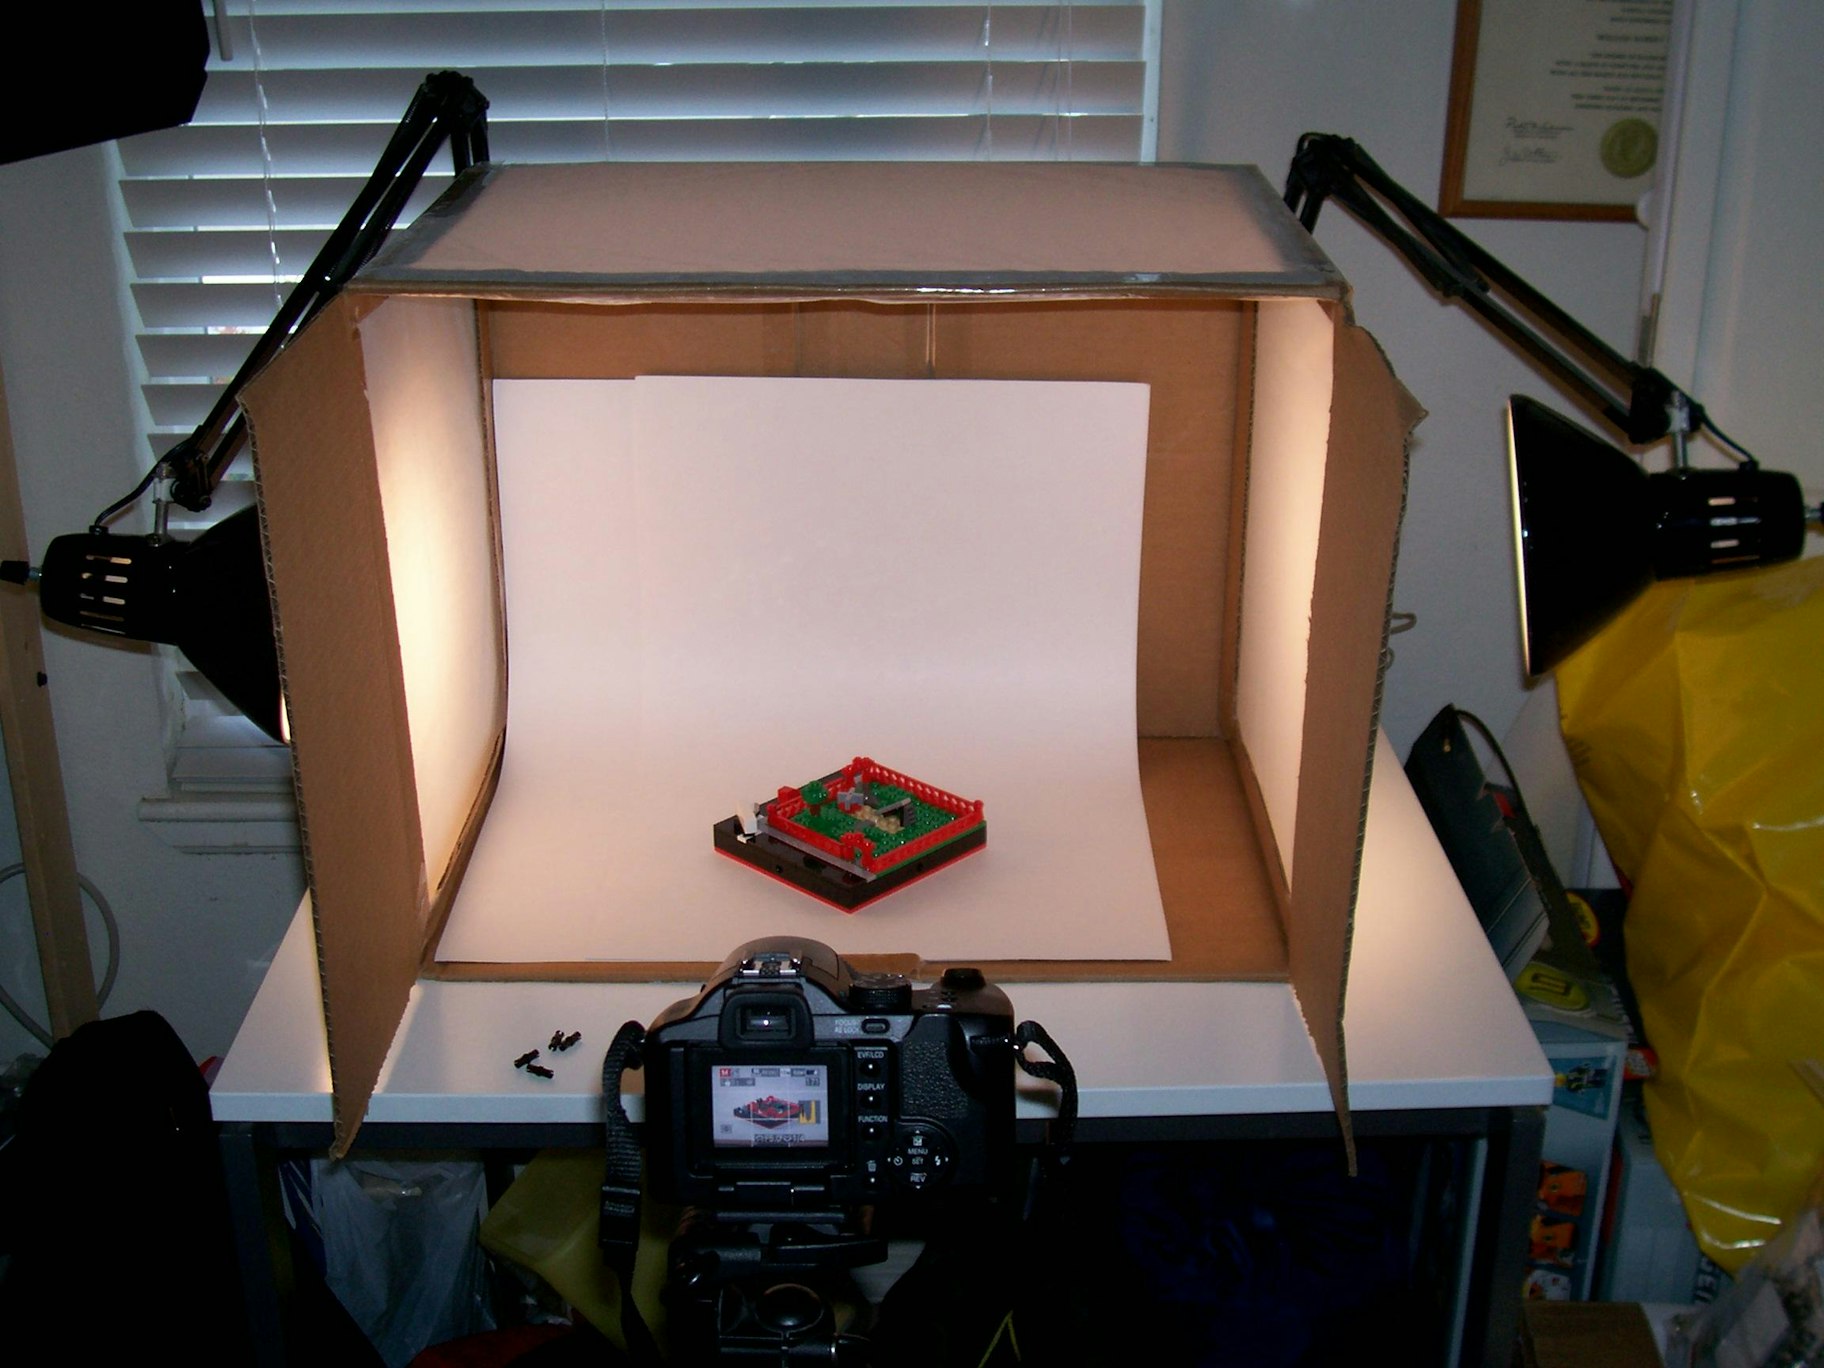
Ideally, you should use natural lighting for capturing lifestyle images and a light box for white background ones. Some light boxes even allow you to change the white background by placing a colored paper chart inside the box.
Use image editing tools
Completing the shoot is just one aspect of creating great imagery. Editing your photos to enhance their appeal is important, too.
Below is a list of product photo editing tools that you can use to spruce up those shots.
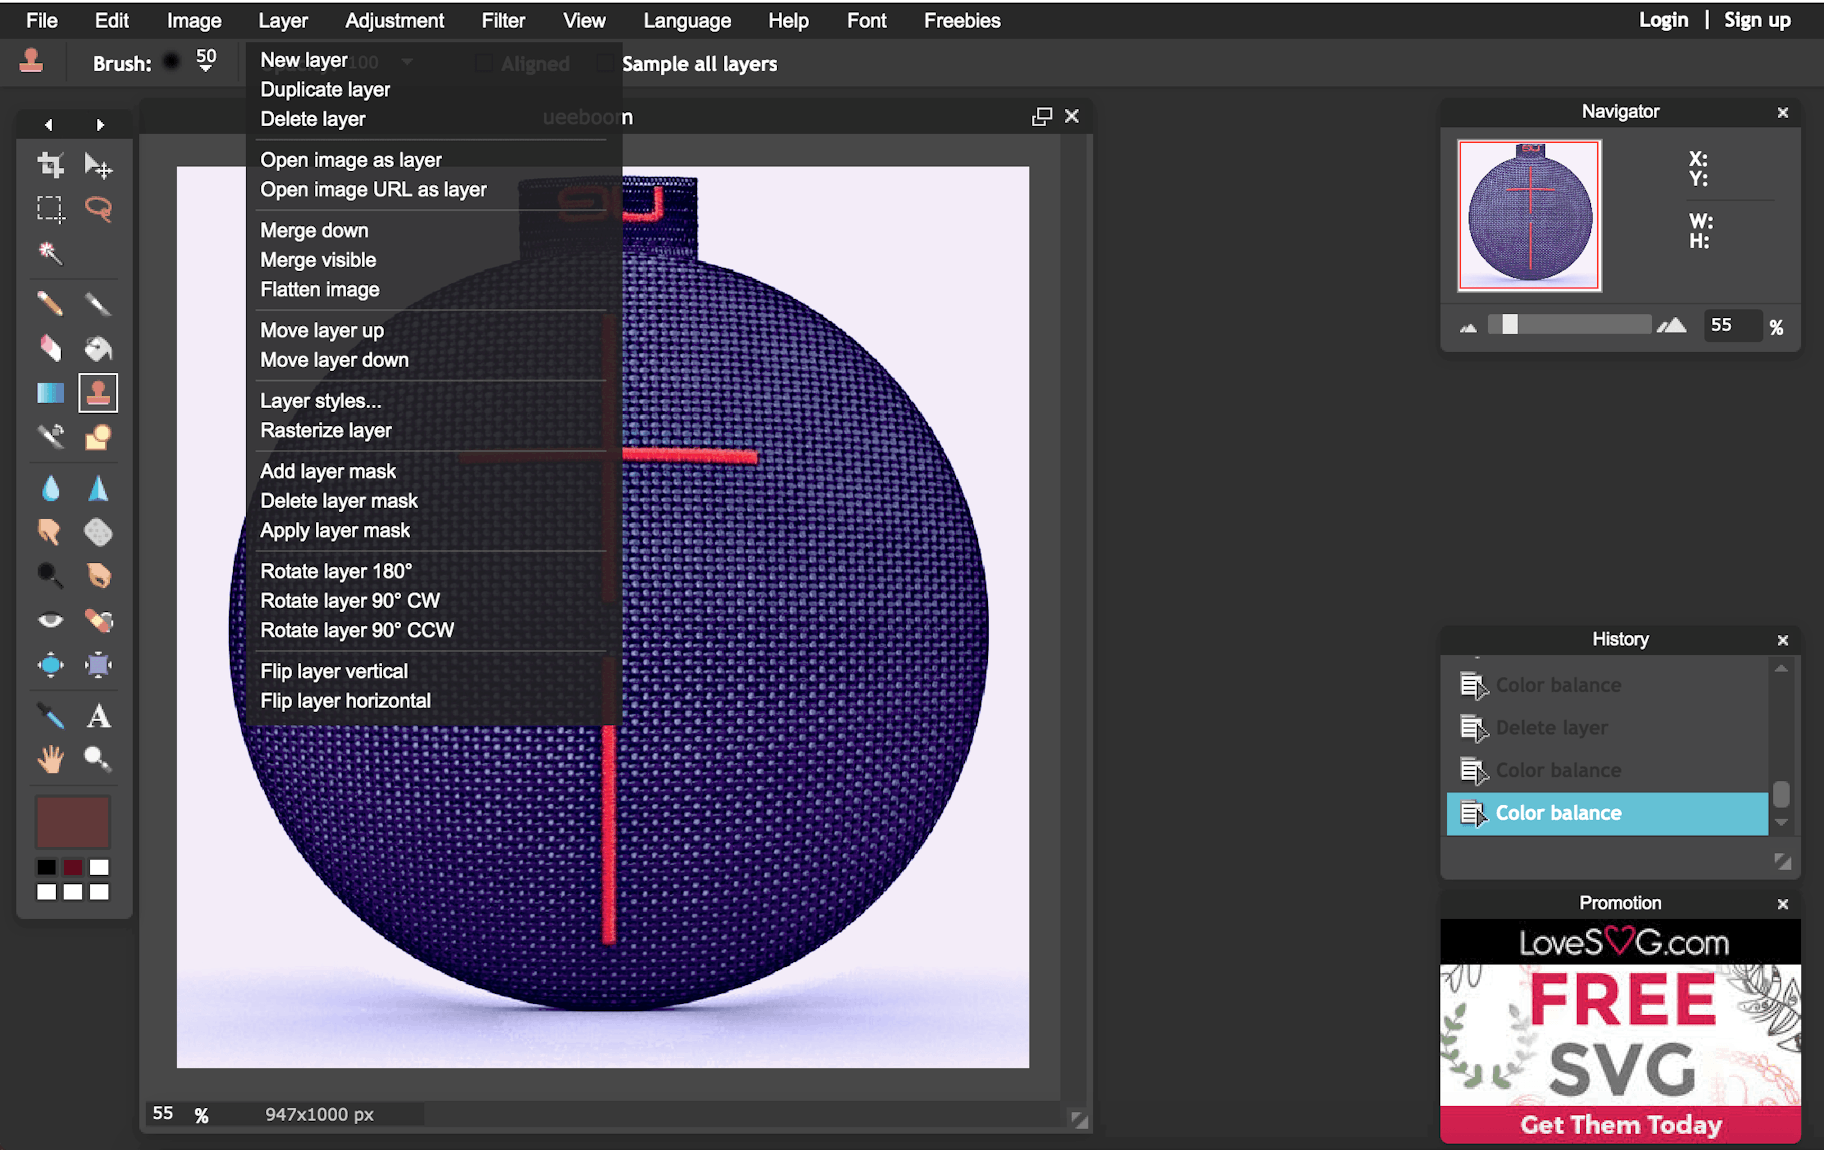
Pixlr is a robust online image editing tool that lets you add effects like borders and overlays in real-time. Its clone stamp feature copies a specific portion of an image and paints it wherever you like, which is handy for removing minor imperfections, such as a wrinkle on the background.
You can also crop and resize the image within the tool.
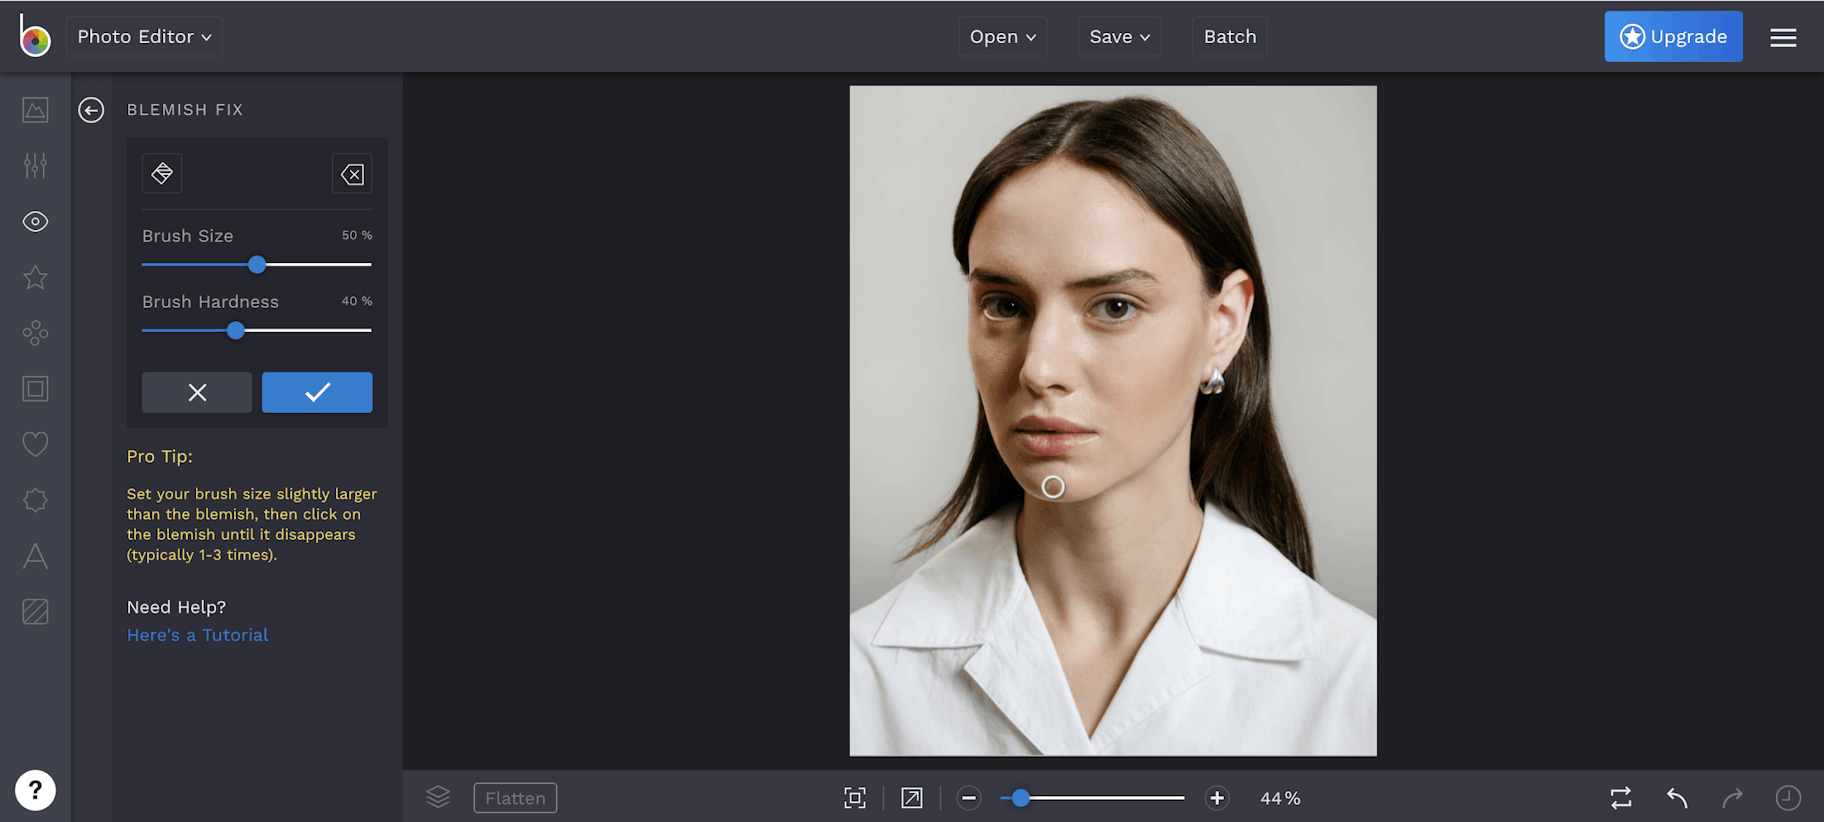
Originally intended for creating collages, BeFunky is now an all-in-one image enhancer that allows for hassle-free product photo editing. It’s especially useful when you have a model in your product image.
BeFunky even has specialized Touch Up tools, like the “Blemish Fix” feature.
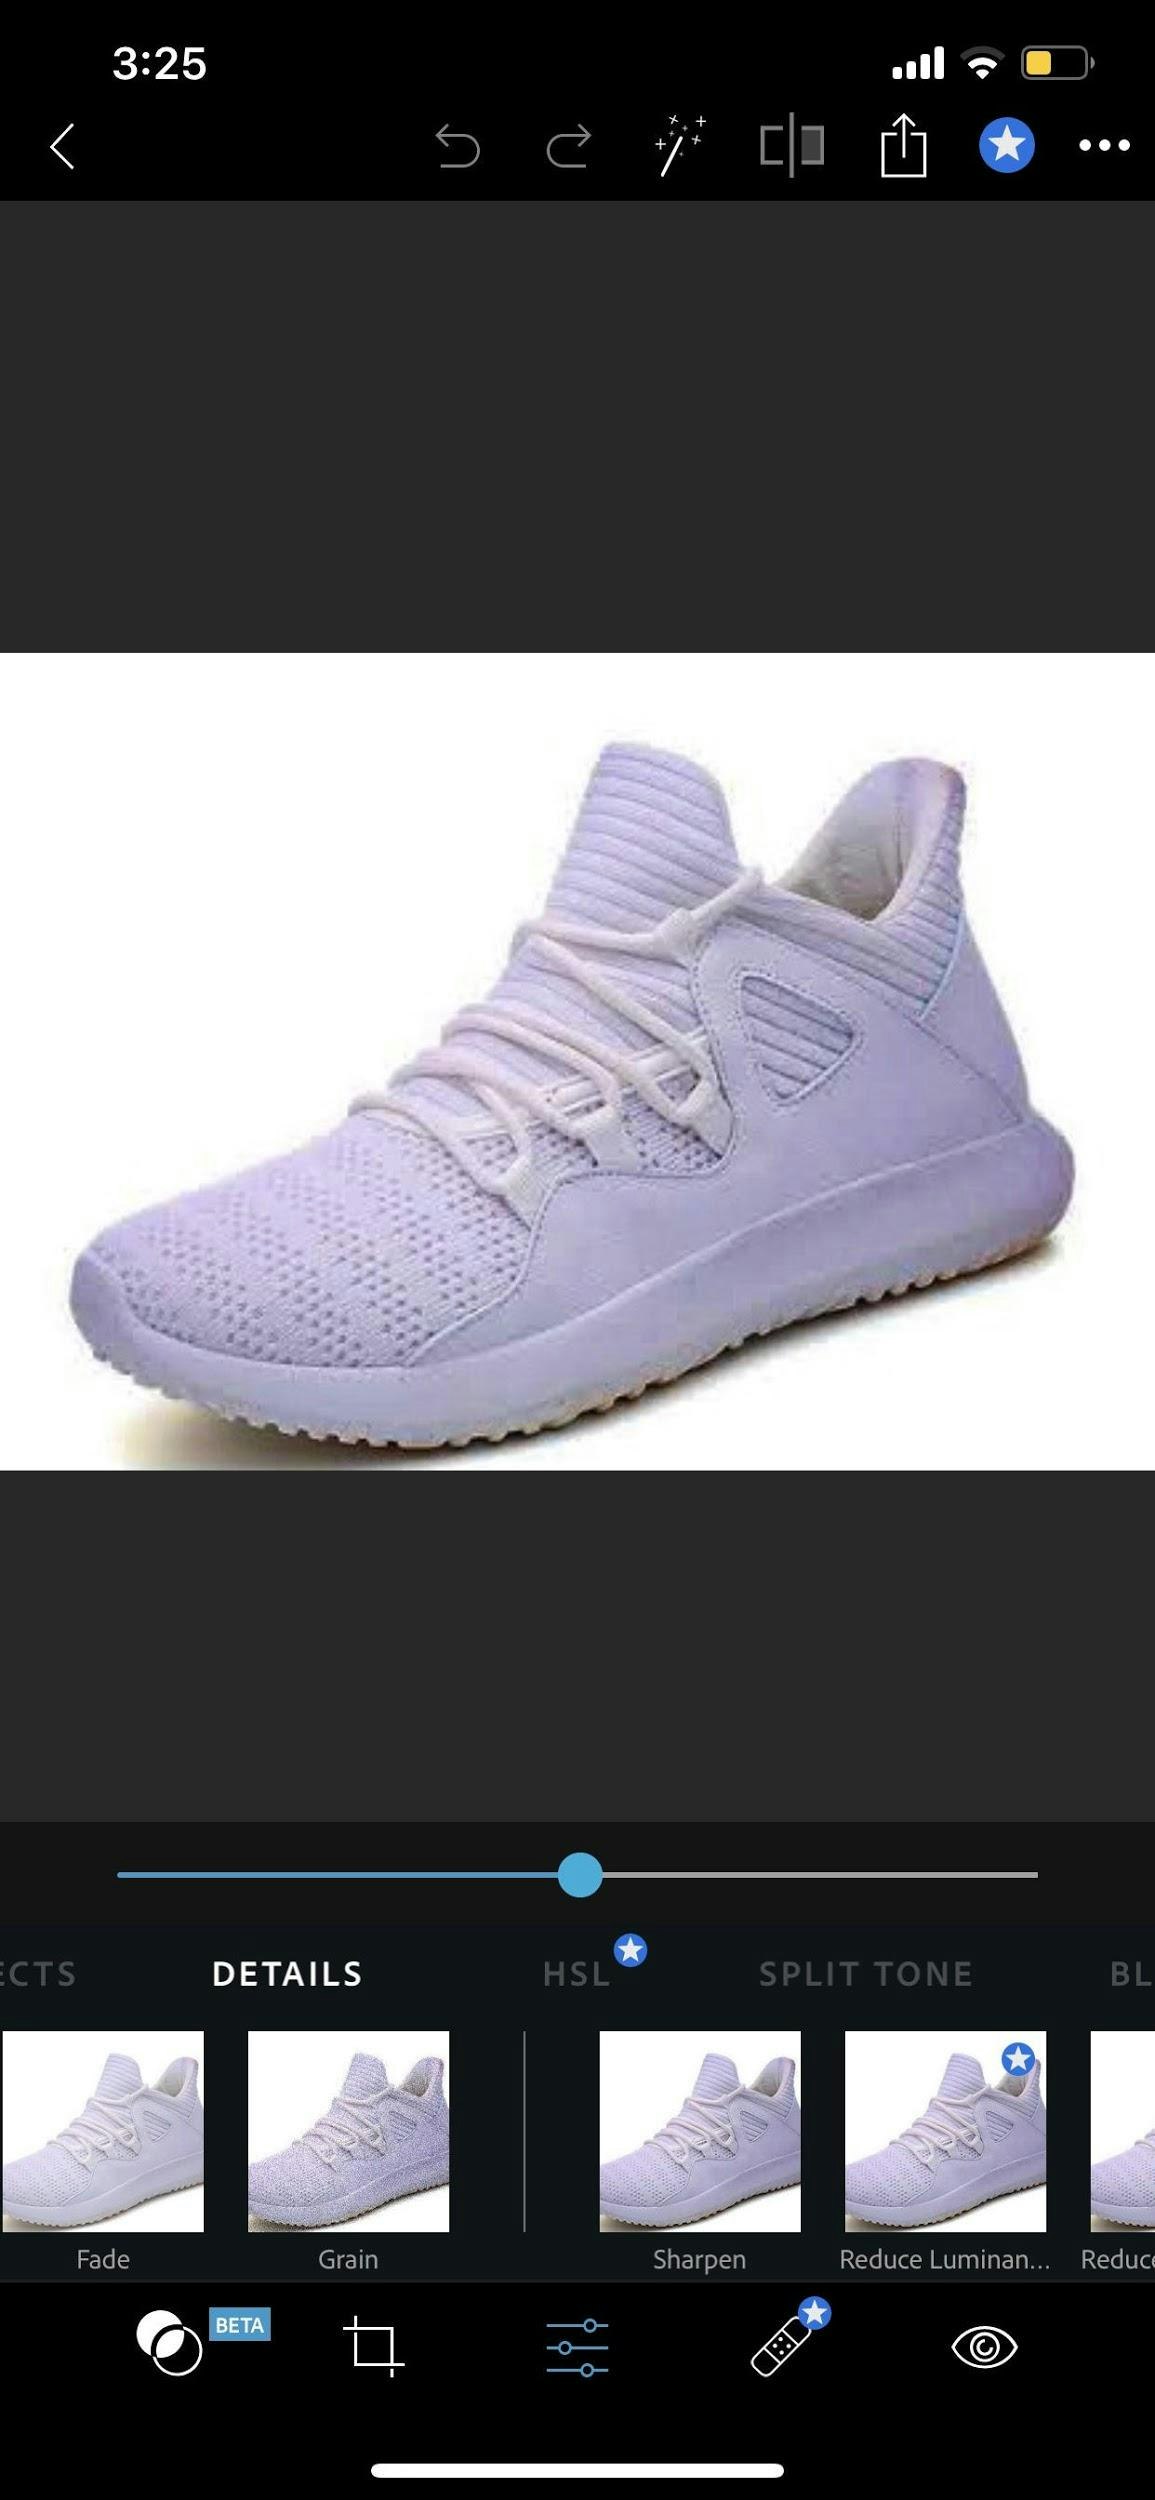
You’re probably familiar with Photoshop, but Adobe also offers an image editing app called Photoshop Express. You can use it to adjust exposure, fix red eye, rotate, and more. When you’re done, add a filter or border and share your images via text, email, or social media directly from your phone.
Need more mobile-friendly options? Here are 17 photo editing apps for iPhone and Android.
Additional product image tips
Most ecommerce entrepreneurs understand the power of images, but even those with great product imagery can benefit from a few tips.
Without further ado, here are some unique ways to boost conversions with product photos.
1. Offer a way to zoom in
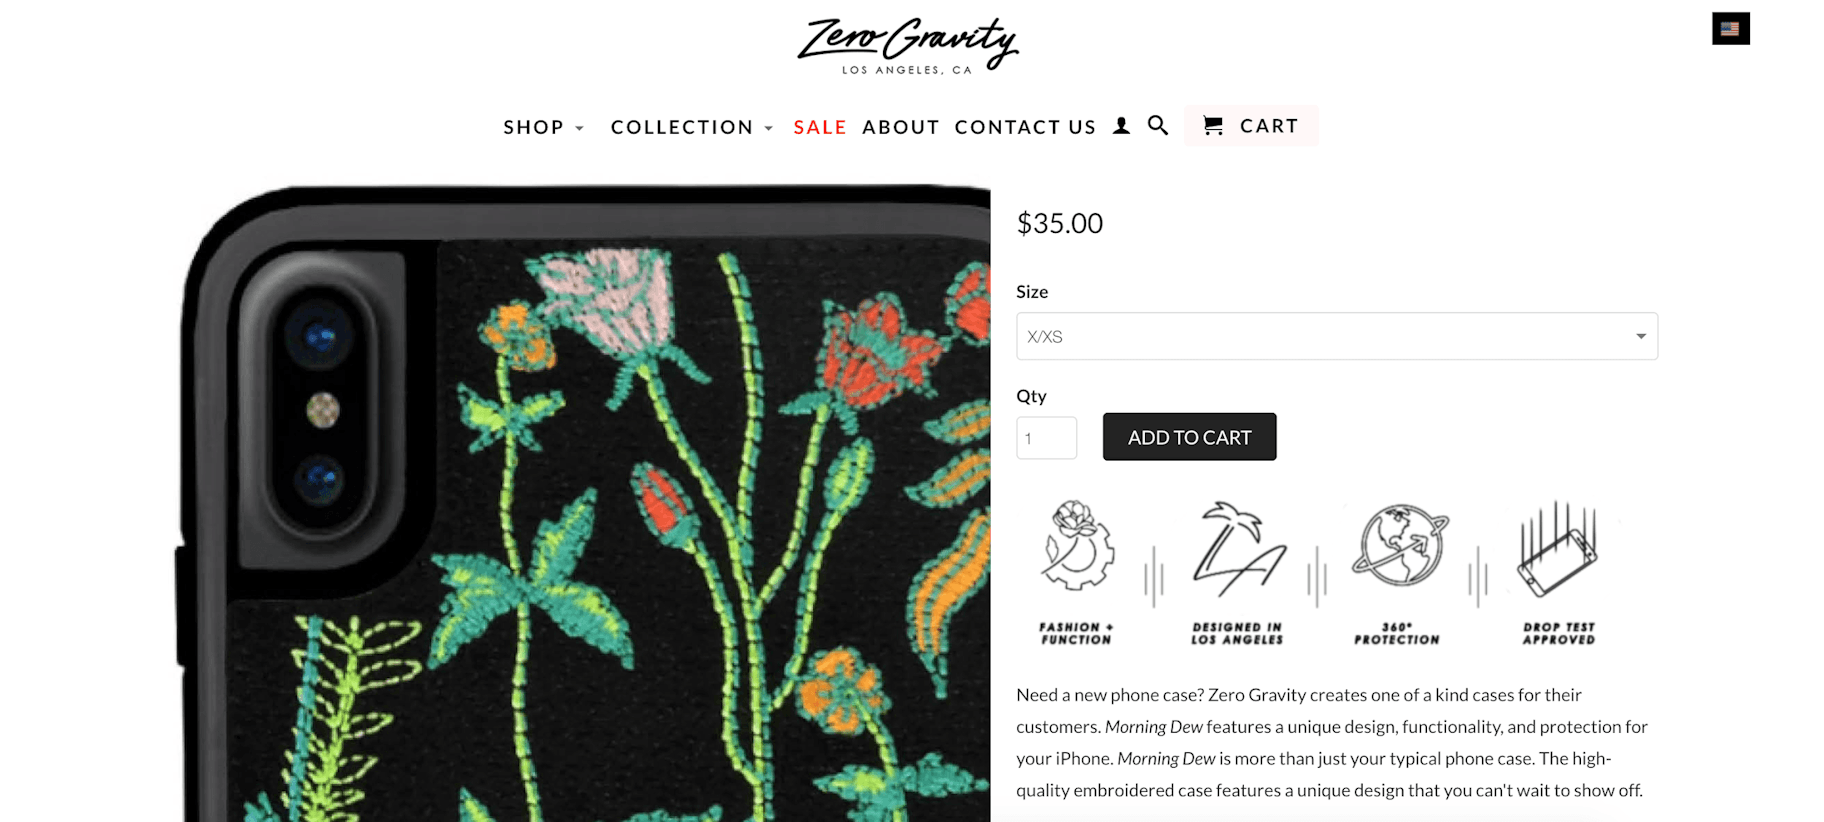
Fine detail is important, and the zoom feature on your product image allows shoppers to take a closer look.
For example, smartphone case maker Zero Gravity lets people zoom in to view the texture of its beautiful hand-embroidered designs.
Fortunately, zoom isn’t a difficult function to set up. Many Shopify themes have “image zoom” enabled. You can also use a plugin like Magic Toolbox to give people an up-close view of your items.
2. Reduce the file size of your product images
The file size of your product image can have a profound impact on the loading time of your site.
Smaller images (around 50 to 100 kilobytes) always load faster. But it’s critical to balance image quality so your site isn’t a blurry, pixelated mess.
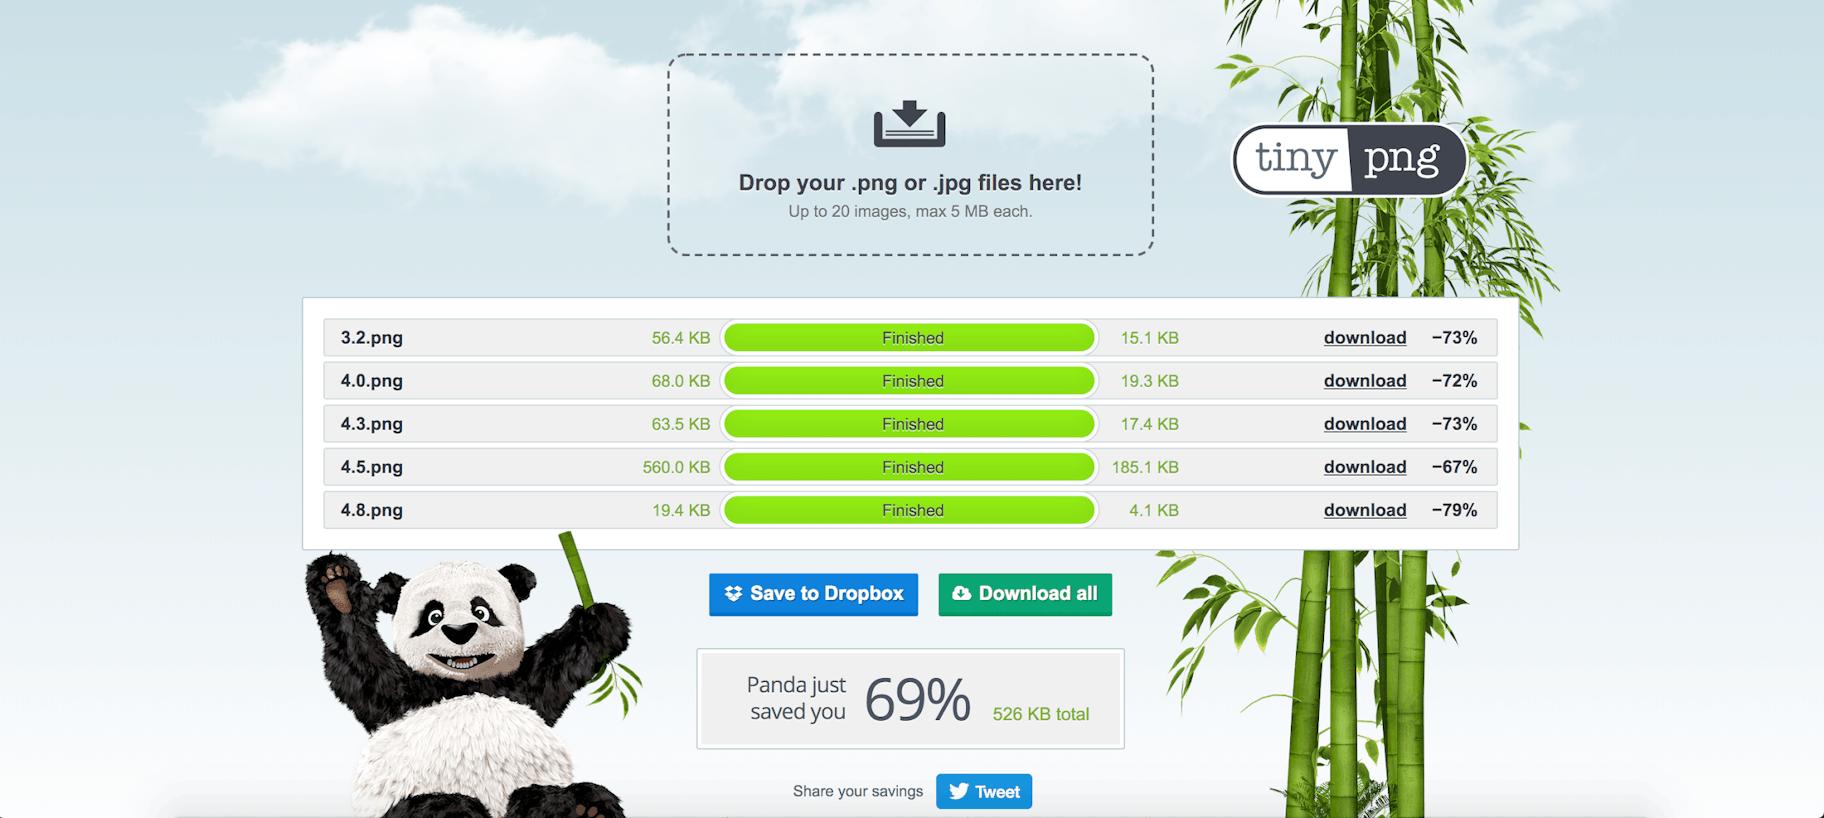
To reduce the size while retaining integrity, save your image file as “.jpg” or “.png” and then run it through an image compression tool like TinyPNG.
You can upload several images on this platform, and it’ll return the smaller file size for each one. Upload the compressed files on your product pages to ensure they load fast. The faster your pages load, the more you can prevent visitors from losing interest.
3. Don’t forget to use the alt tag
The alt tag (also called alt text) describes the content or nature of a product image when it fails to load. To set up an alt tag, describe the product you see in words.
Alt tags also carry SEO value, as they’re indexed in Google, and may show up for image searches.
BONUS Ecommerce SEO Quiz
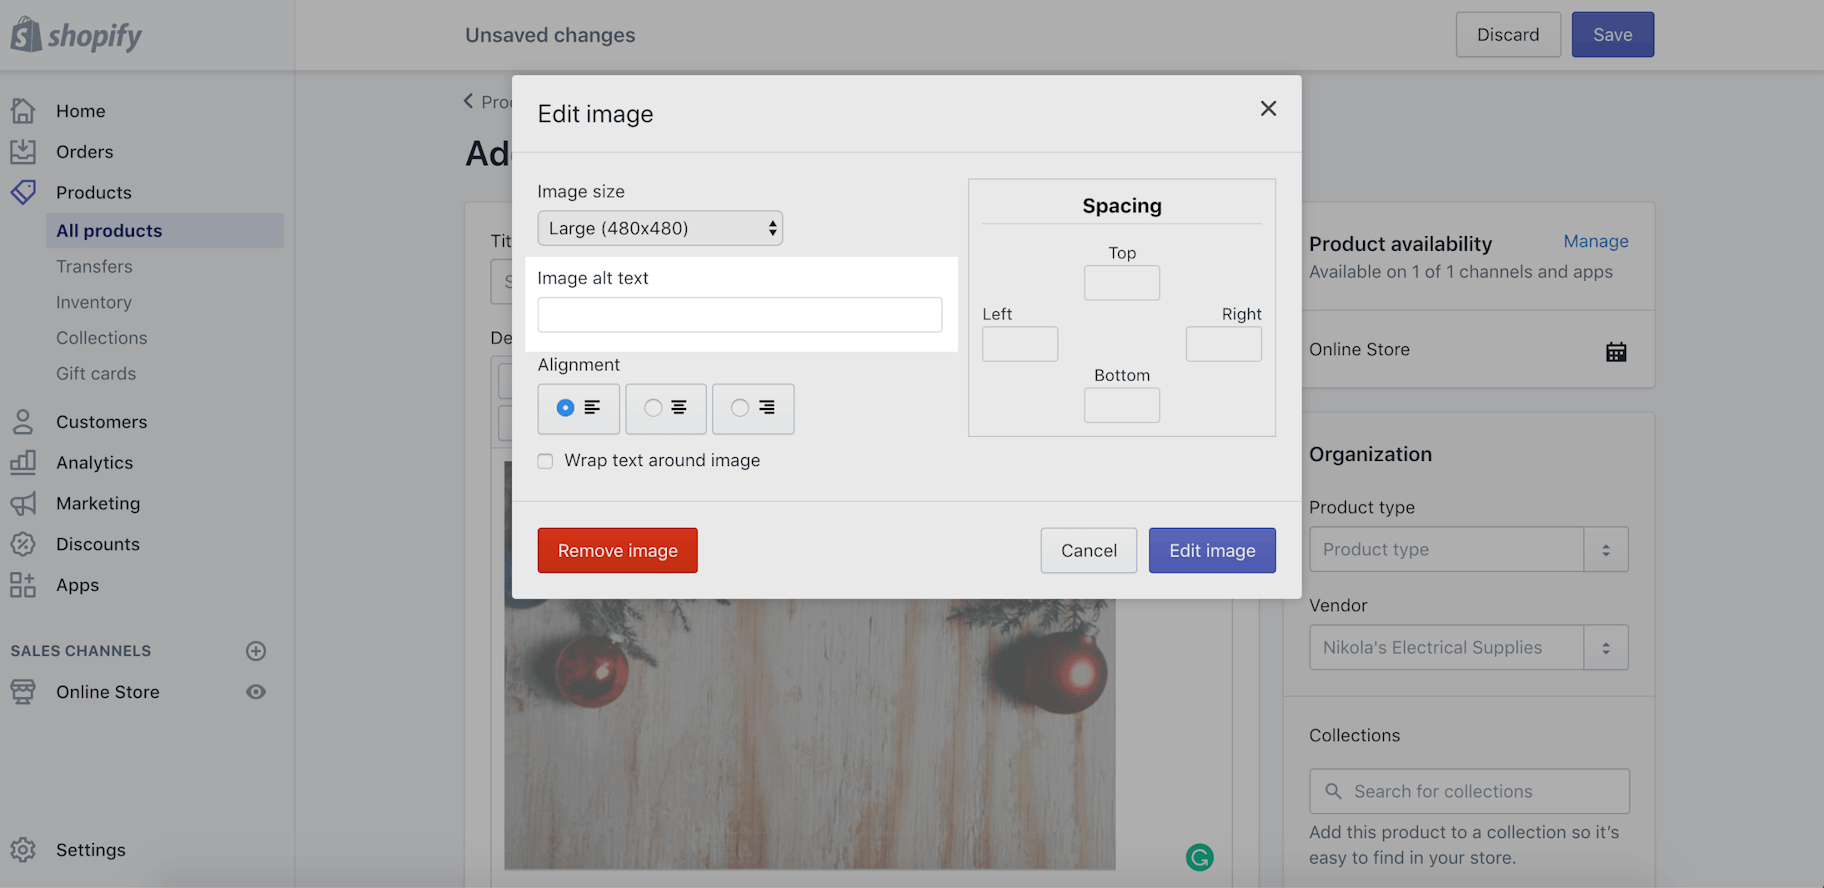
Most ecommerce platforms allow you to define the alt tag. In Shopify, you can write the tag as you’re uploading an image.
Another way is to edit an image and then write the alt tag in the relevant field.
Pro tip: It’s also important to ensure that your images look good on mobile. The best way to do this is to use a mobile-friendly ecommerce theme. Shopify has a range of mobile-friendly themes that automatically optimize your product images for the smaller screen.
4. Hire a photographer or editor if needed
If you don’t have the budget, skills, or bandwidth to learn how to take product photos at home, there are dozens of opportunities to hire professional photography talent for product photo editing and photography.
If you don’t have any existing connections, you can use freelance websites like:
A quick search for “product photography” on Fiverr returned 729 results.
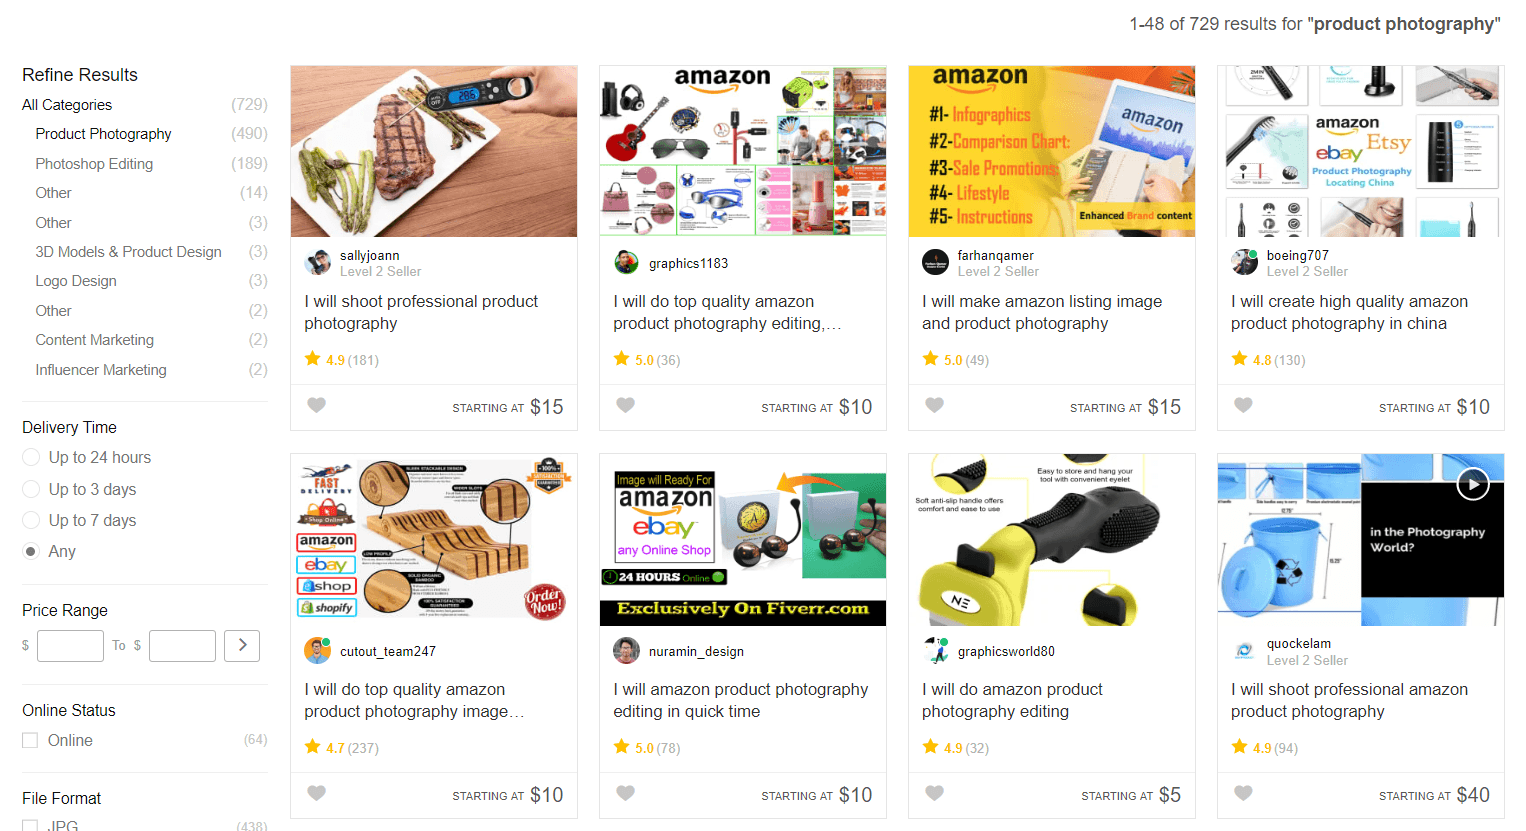
Some of these options are extremely affordable, but be sure to do your research and get examples first.
Now that you have the low-down on choosing, editing, and taking product photos that boost your brand’s appeal, let’s discuss how to create product videos in Chapter 4.


